Templates
The Templates page lets you manage payload templates and profiles through the admin UI. It provides a three-tab layout: Templates for managing reusable content blocks, Profiles for composing field mappings that wire templates into action payloads, and Playground for testing how profiles render against sample data. For background on the template system, see Payload Templates.
Templates Tab
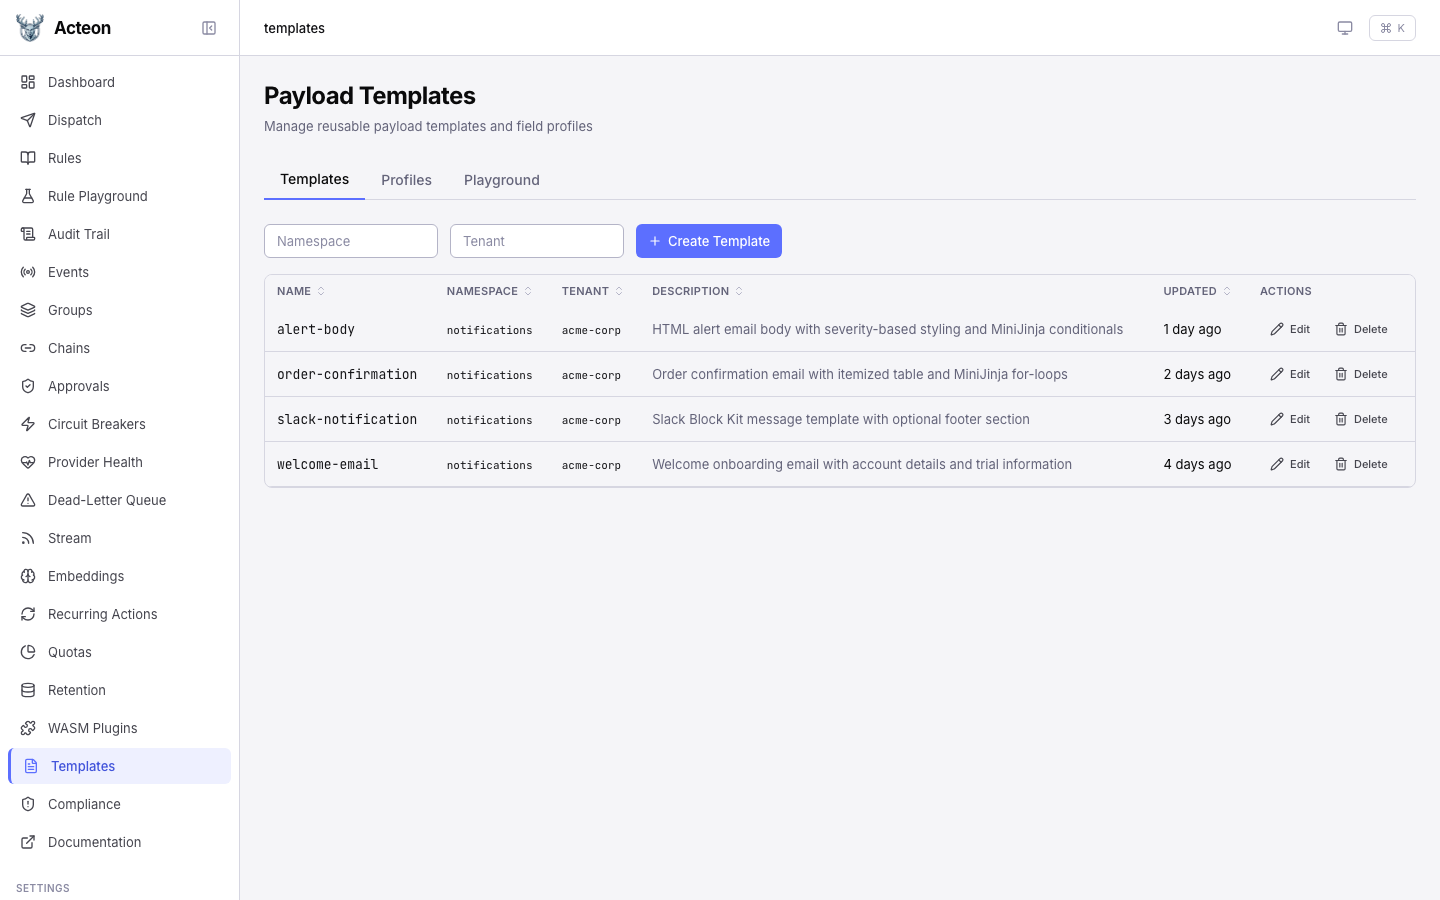
The Templates tab displays all stored templates in a sortable data table. Each row shows the template name, namespace, tenant, description, and last-updated timestamp.
Browsing Templates
Use the namespace and tenant filters at the top of the page to narrow the list. The table columns are sortable -- click a column header to reorder. When no templates exist for the current filter, the page shows an empty state with a prompt to create your first template.

Creating a Template
Click the Create Template button to open the creation modal.
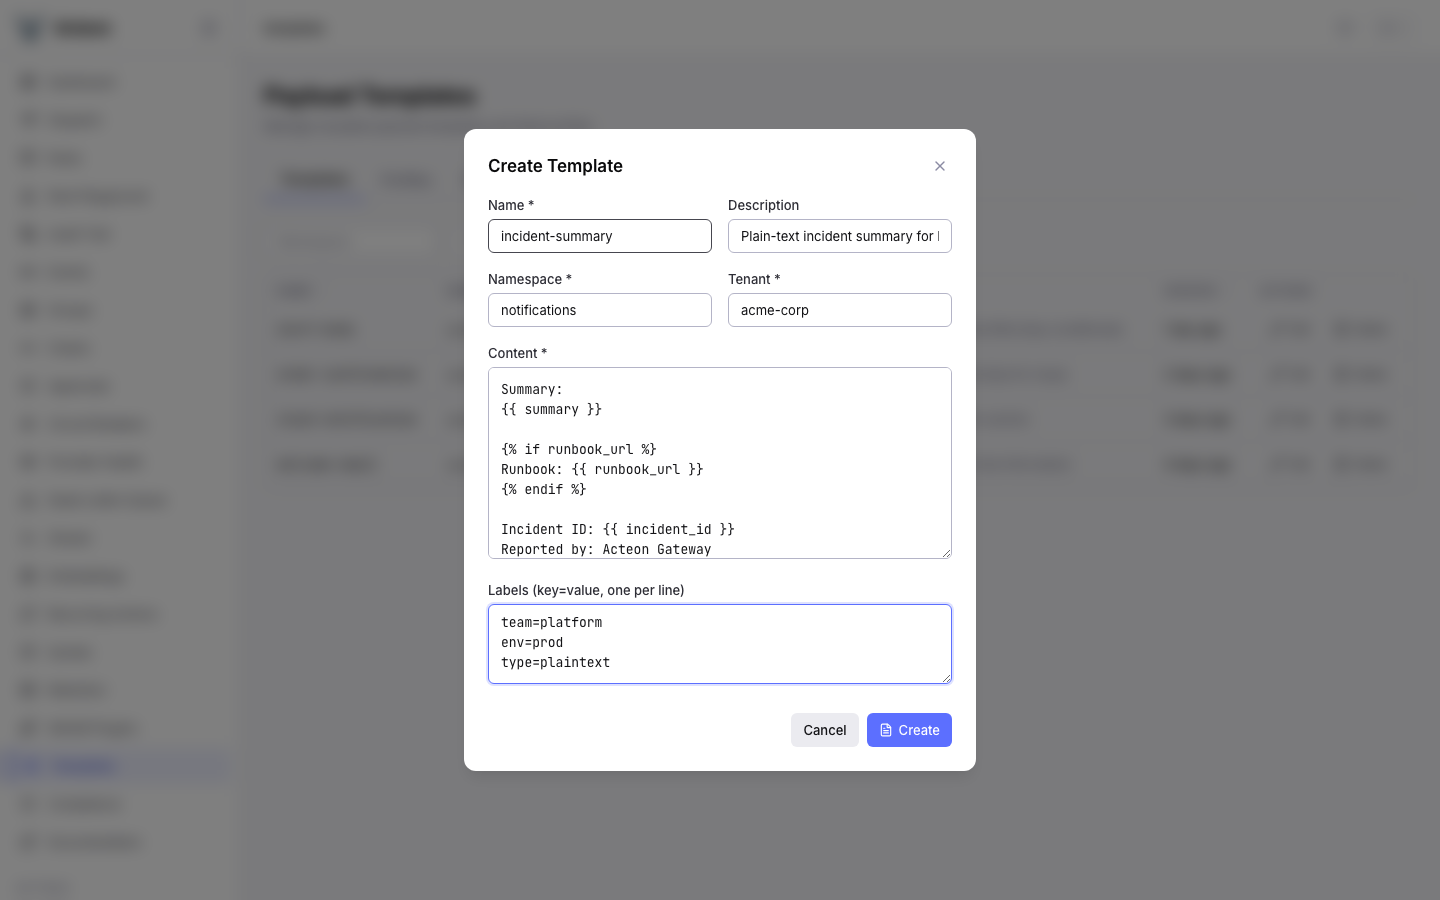
Fill in the following fields:
| Field | Required | Description |
|---|---|---|
| Name | Yes | Unique identifier (alphanumeric, hyphens, underscores, dots; max 128 chars) |
| Description | No | Human-readable description of the template's purpose |
| Namespace | Yes | Namespace scope for the template |
| Tenant | Yes | Tenant scope for the template |
| Content | Yes | MiniJinja template body with variable placeholders like {{ name }} |
| Labels | No | Key-value labels for organization (one per line, key=value format) |
The content field accepts full MiniJinja syntax including variables, conditionals, loops, and filters. The server validates syntax on save -- invalid MiniJinja is rejected with an error message.
Click Create to save. The new template appears in the list immediately.
Viewing Template Details
Click any row in the templates table to open the detail drawer on the right side of the page.
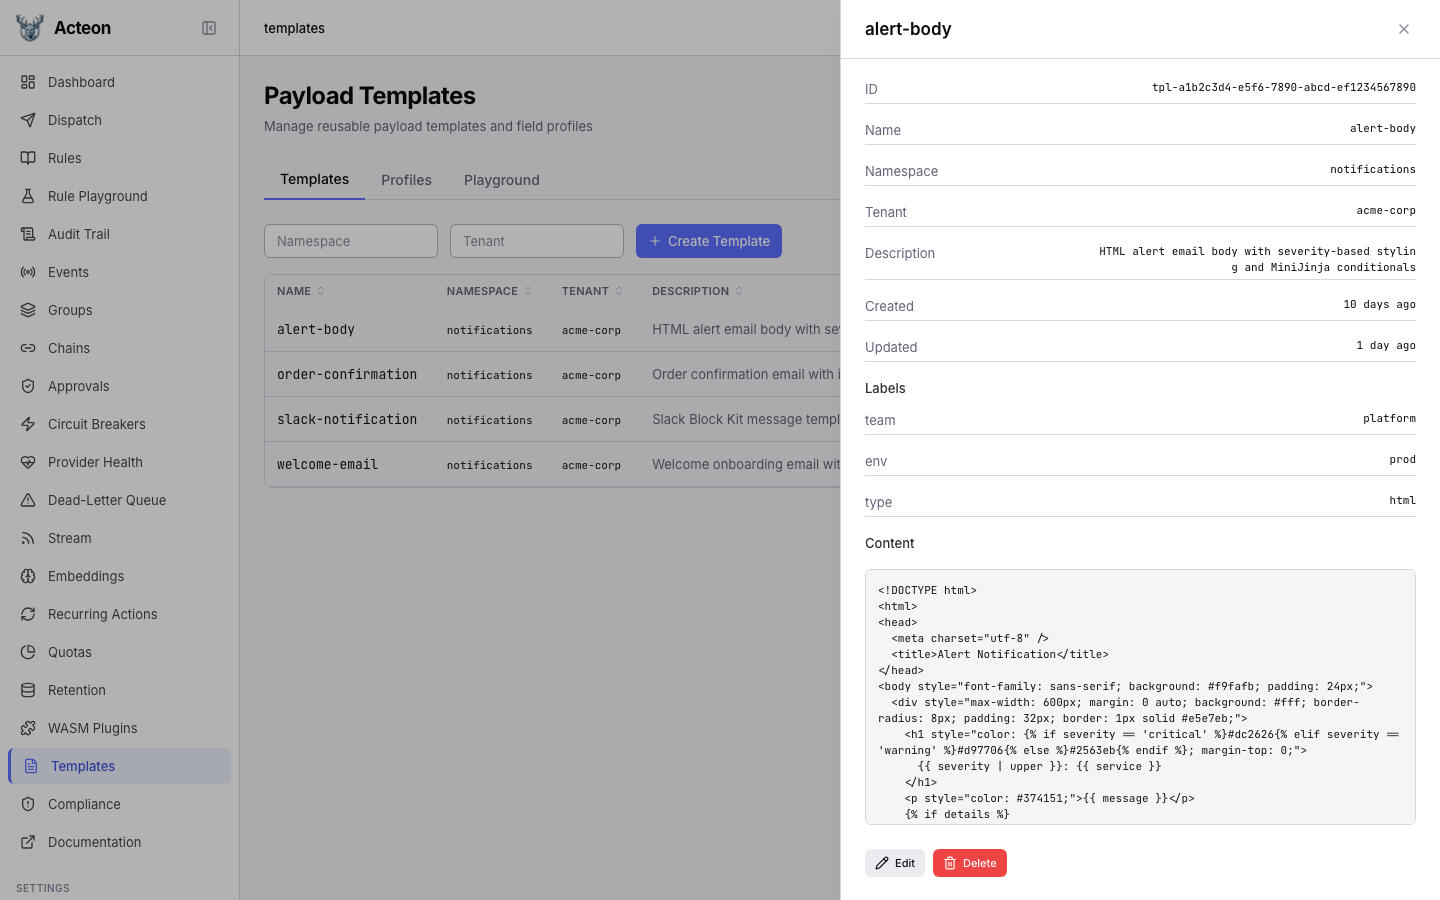
The drawer shows:
- ID -- the system-generated UUID
- Name, Namespace, Tenant -- scope identifiers
- Description -- the template's purpose
- Created and Updated -- timestamps
- Labels -- all attached labels displayed as badges (e.g., team, env, type)
- Content -- the full MiniJinja template body in a scrollable preview
Editing and Deleting Templates
To edit a template, open the detail drawer and click the Edit button. The drawer switches to an editable form where you can modify the description, content, and labels.
To delete a template, click the Delete button. A confirmation dialog appears warning that deleting a template may break profiles that reference it via $ref.
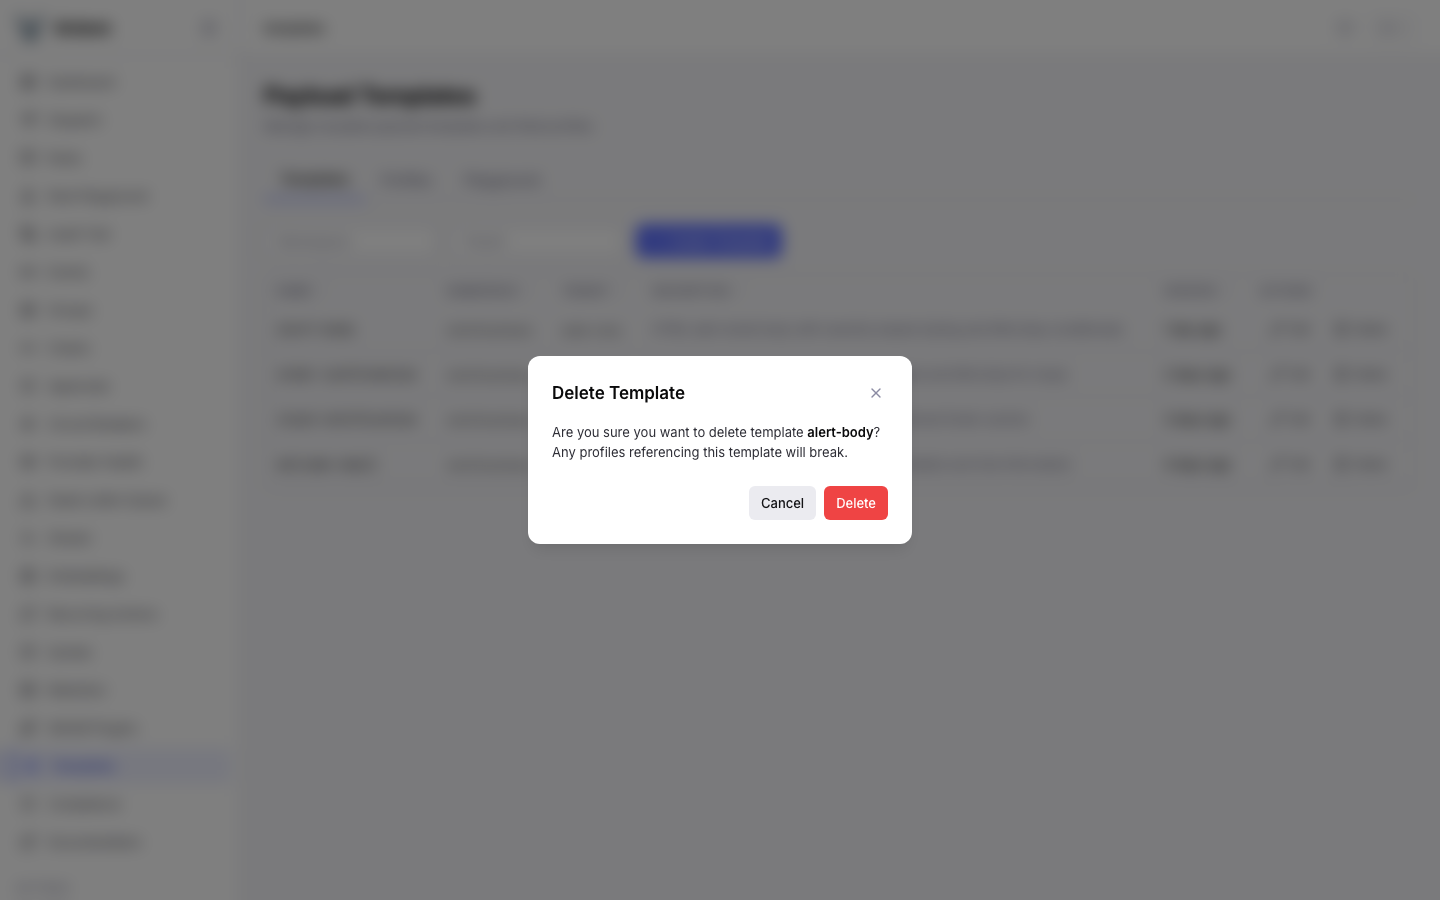
If any profile currently references the template, the server returns a 409 Conflict error. You must update or remove the referencing profiles before deletion.
Profiles Tab
Switch to the Profiles tab to manage template profiles. Profiles map payload field names to template content -- either inline MiniJinja strings or $ref references to stored templates.
Browsing Profiles
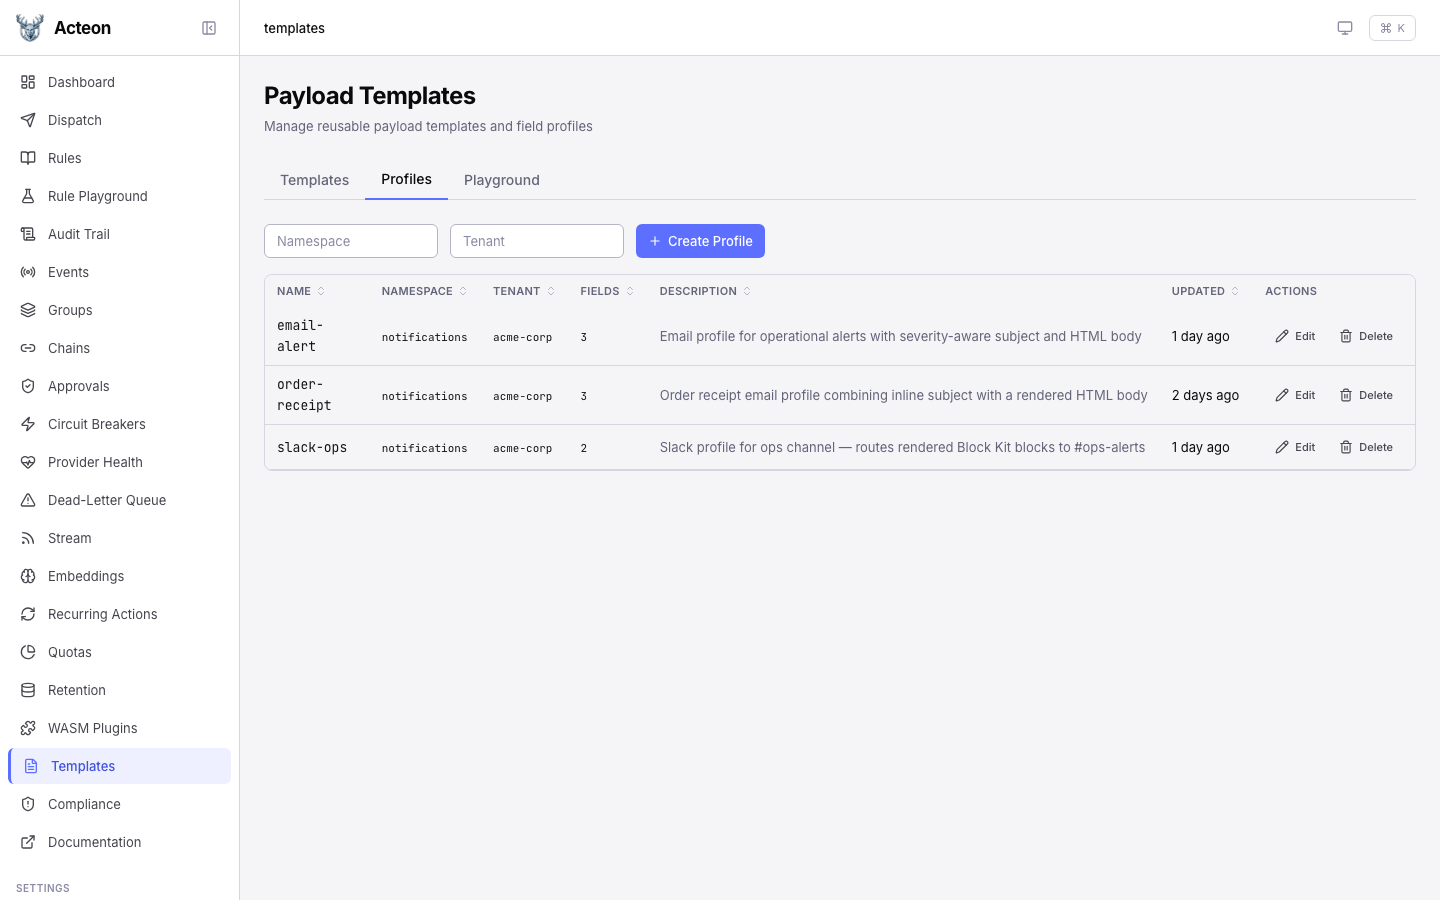
The profiles table shows each profile's name, namespace, tenant, field count, and description. Like the templates table, it supports namespace and tenant filtering and column sorting.
Creating a Profile
Click Create Profile to open the creation modal with the dynamic field builder.
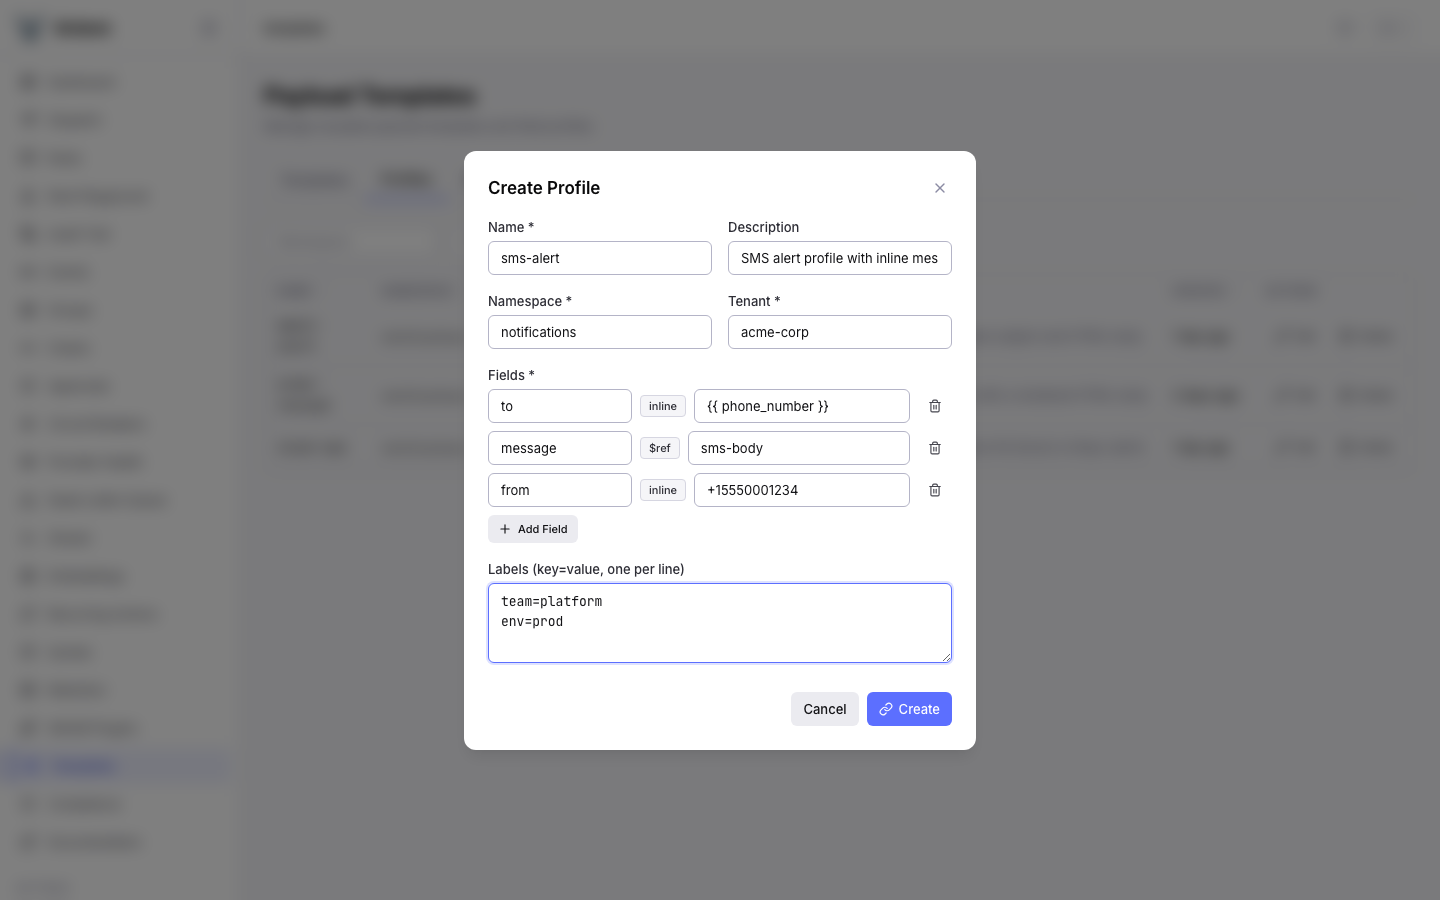
Fill in the profile metadata (name, namespace, tenant, description), then use the field builder to define payload field mappings. For each field:
- Enter the field name (the key that will be merged into the action payload)
- Choose the field type:
- Inline -- type a MiniJinja expression directly (e.g.,
{{ phone_number }}) - $ref -- enter the name of a stored template to reference
- Enter the value (either the inline MiniJinja string or the template name)
Click Add Field to add more rows. The example above shows three fields: to as an inline value using {{ phone_number }}, message as a $ref to the sms-body template, and from as a static inline value.
The server validates that every $ref target exists as a stored template in the same namespace and tenant scope.
Viewing Profile Details
Click a profile row to open the detail drawer.
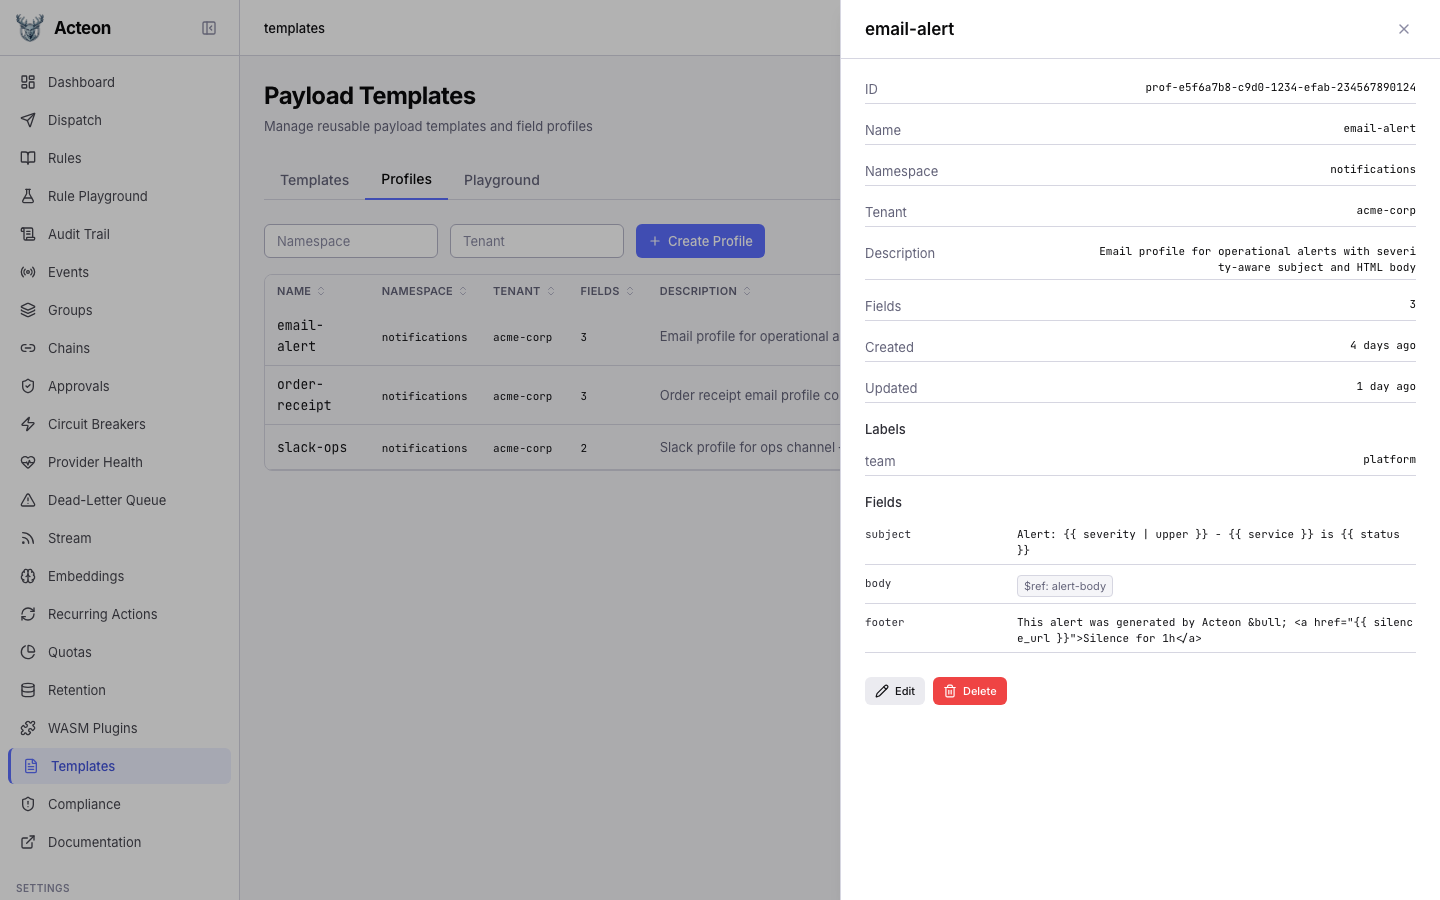
The drawer shows the profile metadata and a Fields section listing each field mapping. Inline fields display their MiniJinja value directly, while $ref fields show a badge like $ref: alert-body indicating the referenced template.
Editing and Deleting Profiles
Editing and deleting profiles works the same as templates. Open the detail drawer and use the Edit or Delete buttons. Profile deletion does not have referential integrity constraints -- you can delete a profile even if actions reference it by name (though those actions will fail at dispatch time if the profile is missing).
Playground Tab
The Playground tab lets you test how a template profile renders against sample data without dispatching any actions. This is useful for validating templates during development, debugging render errors, and previewing output before going live.
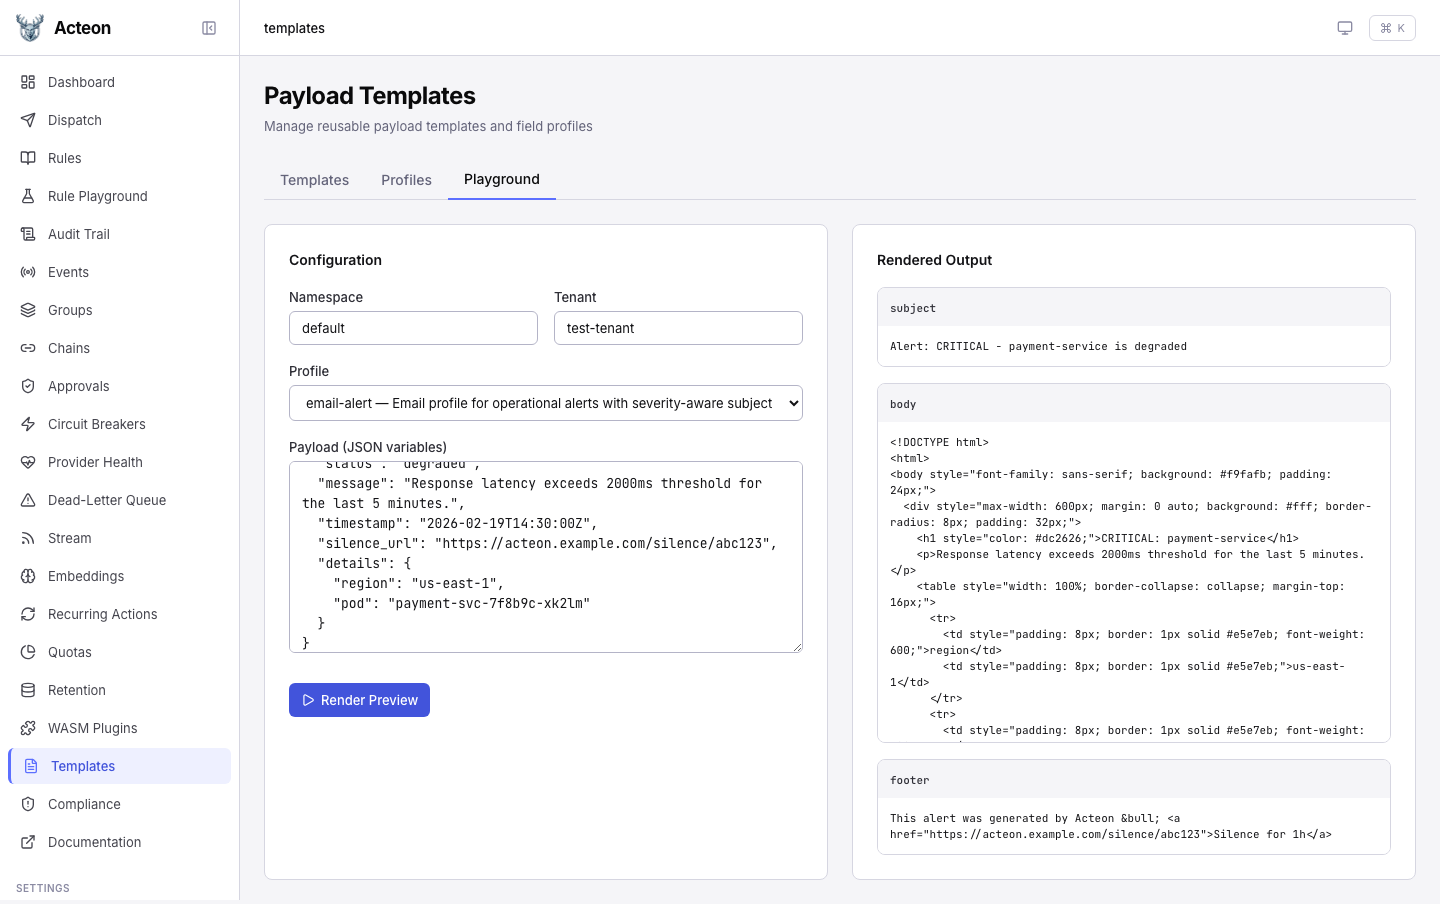
Using the Playground
- Set the Namespace and Tenant to scope which profiles are available
- Select a Profile from the dropdown (profiles matching the current namespace/tenant are listed automatically) or type a profile name directly
- Enter Payload variables as a JSON object -- these are the variables your templates reference (e.g.,
{{ name }},{{ severity }}) - Click Render Preview to send the payload to the server for rendering
The right panel displays each rendered field in a labeled section. For example, an email alert profile might render three fields: subject (from an inline template), body (from a $ref template), and footer (from another inline template).
If rendering fails -- for example, due to a missing variable or syntax error in a template -- the error message appears in the output panel with details about what went wrong.
Tips for the Playground
- Start with simple payloads. Begin with the minimum required variables and add more as needed. Missing variables render as empty strings by default.
- Test edge cases. Try payloads with empty strings, missing optional fields, or unusual characters to see how your templates handle them.
- Iterate quickly. The playground calls the same render engine used at dispatch time, so what you see here is exactly what the provider will receive.
Understanding Inline vs $ref Fields
The distinction between inline and $ref fields is the key concept in the template system:
-
Inline fields contain MiniJinja expressions directly in the profile. They are self-contained and simple to set up, but the content lives only in that profile. Use inline fields for short, profile-specific values like email subjects or static strings.
-
$ref fields point to a stored template by name. The gateway loads the referenced template's content at render time. Use
$reffor longer content blocks (email bodies, formatted messages) that you want to reuse across multiple profiles or update independently.
A single profile can mix both types freely. For example, an email profile might use an inline field for subject and a $ref field for body.
When you update a stored template, every profile that references it via $ref picks up the change automatically -- no profile edits needed.
Tips
- Start with templates, then build profiles. Create your reusable content blocks as templates first, then wire them into profiles. This avoids
$refvalidation errors during profile creation. - Use labels for organization. Attach labels like
team=platform,env=production, ortype=emailto templates for easier filtering and auditing. - Preview before deploying. Use the Playground tab to test how a profile renders against sample data before dispatching real actions. You can also use the render preview API programmatically.
- Name templates descriptively. Names like
alert-bodyororder-confirmation-htmlmake it clear what the template produces and where it is used. - Keep inline values short. If an inline field grows beyond a single line, consider extracting it into a stored template with a
$ref. This improves readability and enables reuse.